Thursday, February 27, 2014

Bourbon Caramel Brownies

     I already went on a pretty long rampage in my last post about my sudden desires for bars, particularly brownies. Although I got slightly sidetracked by some totally worth it blondies, I had to return to my original intentions. I will not talk to much in this post, because I realized as I cut these in squares a few hours ago just how tantalizingly sexy a brownie can be. So I think instead, I will just let the photos help you ponder what I mean by that...
Maybe it is the smell of butter, burnt sugar and bourbon that fills your kitchen as they bake.
Maybe it is the thick, dark chocolaty color they contain.
Maybe it is their fudgy, sticky quality.
Or just maybe it is the crunchy, sweet and salty notes the walnuts add from candying in the caramel.
I don't know what it is exactly, but these are sexy brownies.

Notes: If you don't want to use bourbon, substitute 1/4 C heavy cream for the bourbon. However, since the bourbon is balanced with the butter, it is not too strong and rather takes on a buttery caramel flavor with notes of bourbon. It is not overwhelming. For cocoa powder I did a mix of 3/4 C natural (un-alkalized) and 2 TBSP super alkalized (called Black Onyx from Savory Spice Shop in Denver). The cocoa powder is flexible though, so you can use all Dutch processed, all natural, or some combo of the too if you would like. 

Brownie base is from Alice Medrich's BitterSweet, "Best Cocoa Brownies." Found on Epicurious

Caramel/Topping:
1/2 C sugar
2 TBSP water
4 TBSP unsalted butter
1/4 C bourbon* (see notes)
1/4 TSP salt

1/2 C Walnuts 

Brownies:
10 TBSP unsalted butter
1 1/4 C sugar
3/4 C + 2 TBSP cocoa powder* see notes
1/4 TSP salt
1/2 TSP vanilla extract 
2 cold eggs
1/2 C all-purpose flour

For the caramel:
1. In a small saucepan, combine the sugar and water, turn onto medium heat and allow the sugar to liquefy and brown to a copper color (for more caramel making details go to Bananas Foster Cake)
2. Remove the pan from the heat, stir in 4 TBSP of diced butter, until it melts. Next add the 1/4 C of bourbon and salt, continue to stir, and then return the pan to heat. 
3. The mixture will seize into a ball. Continue to stir until the clumps have undone them selves and the caramel has darkened just a smidge. 
4.Pour the caramel onto a silicon mat or piece of parchment paper over a plate and place it in the freezer to harden.

For the Brownies:
1. Preheat the oven to 325F and line with aluminum and grease an 8x8 pan. 
2. In a heatproof bowl, combine the butter, sugar, cocoa powder and salt. Place the bowl over a small saucepan with an inch of simmering water. Stir the mixture periodically until the butter has melted and the ingredients have mixed together.
3. Remove the cocoa mixture from heat and let it cool. 
4. When it is warm (no longer hot), stir in the vanilla extract, followed by the eggs, one at a time they have completely combined. Add in the flour and stir until that is completely combined as well.
5. Transfer the batter into the prepared pan.

Assembly:
1. Remove the caramel from the freezer and cut it into small squares. Remove the squares and scatter them over the top of the brownies.
2. Chop the nuts into smallish pieces and scatter them on top of the caramel.
3. Bake in the oven at 325 for 25-30 minutes until the brownies have cooked through (you can use a knife to check). The caramel on top will look melted and soft, so look past that. It will harden as it cools.
4. Allow to cool in the pan for 20-30 minutes before removing. Allow to cool for 10 more minutes before slicing. They are delicious served with a glass of milk or vanilla ice cream :)
Love,
    Boulder Butter

Sunday, February 23, 2014

Chili Lime + White Chocolate Macadamia Bars

     I have been thinking about bars a lot recently. No, not like pull up bars, nor the bars at the trendy ballet classes, or even the bars that fill you with beer and margaritas. I mean, I have been on a complete cake fixation for months, and then about two weeks ago, it hit me- I wanted my dessert to be in bar form. Particularly, brownies were becoming an obsessive thought. How to make the perfect fudgy brownie? I researched and read up on the science of brownies from the classic sources of chocolate knowledge. It was settled; I would go home one night and make a big batch of brownies, open a red wine and relax. 
     I had the chocolate in hand, walked into the kitchen and all of a sudden, I remembered a recipe I had promised to come months ago when my step-mom bought me a bag of macadamia nuts. I had white chocolate. The wheels started to turn. I no longer wanted brownies; I wanted white chocolate macadamia nut bars. I put away the semi-sweet and replaced it with a bag of white. The ideas started to flow...about an hour later, out came these.
      I disregarded all my thoughts of brownies the moment the chili and sugar coated the macadamias and wafted up at me. By the time they came out of the oven, all I wanted was the rich, buttery squares in front of me. The macadamias are toasted in butter, sugar, and chili and achieve a rich creaminess of their own. They provided the perfect amount of buttery crunch, with tingles of chili in every bite. Occasionally, you get a stronger chili-punched mouthful, but its softened and sweetened by the white chocolate melted throughout. The small chips allow the flavor of white chocolate to never overpower, but only hold in check all the strong flavors vying for your attention. Balancing the bar with their unique sweetness.
     The lime adds a bright fun flavor with the same sensation of the chili-prevalent in every, bite but with strong burst hidden throughout. The chili and lime create a competing warm and cool liveliness on your tongue, dancing around in the sweet, the butter, and the hints of salt. Although this is technically a Blondie, the browned butter yields a dark colored bar. It ups the creaminess significantly and adds a nutty richness. I mean honestly, it does what browned butter does best-just makes everything so much freaking better. These are not as chewy as a traditional Blondie, but they are not at all cakey. Instead they mirror their cousin, the cookie, more than I realized was even possible in a bar. I did not realize what that could be until I made these. They are delightful-so delightful and addictive, I made them twice in four days. I admit to that proudly. 
Inspired by the Beekman 1802 Heirloom Dessert Cookbook's "White Chocolate Macademia Nut Blondies" 

Ingredients
1 C flour
1/2 TSP baking soda 
1/2 TSP salt
1/2 C (1 stick) butter + 1 TBSP
1 egg
3/4 C brown sugar 
3/4 C macadamia nuts 
3/4 C white chocolate chips (mini are great)
1 TSP sugar (or brown sugar)
1 1/2 TSP chili powder*
Zest of one lime 

*You can use 1 TSP to 2 TSP depending on your palate preferences and the freshness of your chili powder. If it is brand new, then go lighter, if it is older, you can use the larger amount. 

Instructions
1. Preheat the oven to 350 F and prepare and 8x8 pan by lining it with aluminum foil and oiling it. 
2. Place the macadamia nuts, chili powder, 1 TSP white sugar, and 1 TBSP butter in a pan, until the butter is melted, the nuts are toasted and the sugar and chili powder caramelize and coat the nuts. The mixture will be fragrant of sweet chili.
3. Remove from the pan and place in a separate bowl to cool. 
4. Wipe out the pan and return it to medium heat on the stove. Add the stick of butter and melt then cook over medium heat until foam forms, goes away and the butter browns to a nutty color and aroma. Pull immediately, move it into another bowl and whisk to cool it quickly and prevent from further cooking. 
5. In a separate bowl, whisk together the flour, baking soda, and salt.
6. Add the brown sugar to the butter and mix until combined.
7. Gently mix together one egg to break the yolk and then stir it into the butter and sugar. Be careful not to over mix here as these bars are prone to a lot of air and you want to avoid creating a meringue effect with an over beaten egg. 
8. Stir in the flour mixture, followed by the nuts, white chocolate, and lime zest. The batter will be dark from the brown butter and a thick, sticky mass.
9. Dump the dough into the pan and spread it out with your fingers to an even top. 
10. Bake for 25 minutes, remove from the oven and allow cooling for 10 minutes before taking the bars out of the pan. Allow cooling for 10 more minutes, then cut into squares using a sharp knife or pastry cutter.
Love,
   Boulder Butter 

Sunday, February 16, 2014

Citrus Baked French Toast

        I must let you guys know the most important fact about this before I go any further: it is the most ridiculously simple, sweet breakfast, which yields irresistible results. You can throw it together in minutes the night before, get up on a lazy morning and put it in the oven for 30 minutes. Sip on your coffee and relax, then voila yourself and others will beam with happiness. 
      French toast already has a simplicity appeal.  However, this kicks it up a notch to essentially all hands off in the morning with still getting to eat an epic breakfast. Isn't that just so awesome? 
     It was particularly perfect for my purposes of a brunch potluck on Sunday. The night before, my roommate and I went out to a concert that we had been long awaiting. Around 8 o'clock, I took the whole 10 minutes this requires to put it together, placed it lovingly in my fridge, and prepared to dance the night away. 
        After a luxurious sleep-in sesh the next morning, I woke up, took it out of the fridge, preheated the oven, and popped it in. I walked away and got ready for company-you might be able to hear my sigh of relaxation right now. Thirty minutes later, I was meet with puffy topped, golden brown, custardy, warm, blissful French toast and the guests began to arrive. My friend was kind enough to bring a whiskey and cayenne maple syrup that make the custardy texture and bright citrus flavors simply sing with happiness in my mouth. 
      For brunch party folks or those simply wanting a mouth-watering, smell-wafting dish in their house on a lazy Sunday morning, I cannot emphasize enough how much this is for you. A lot of baked French toasts call for much more of everything: more eggs, both milk and cream, more this, more that. I can fully attest it is not necessary for the texture you seek. You only need the basic things you probably already have on hand to create a whimsical weekend morning of French toast, coffee, and appreciation of the finer things in life. 

Ingredients:
1 loaf challah (nothing fancy needed)
3 c whole of 2% milk 
3 eggs
3 TBSP butter
3 TBSP brown sugar
1/2 TSP salt
1/4 TSP cinnamon
Dash of nutmeg
Zest of 1 orange and 1 lemon

Instructions
1. The day before, slice the challah in 3/4-1" slices. Lay it out and let it sit on your counter for the day, flipping over when you happen to be in the kitchen (no worries if you're not around though).
2. At night, arrange the slices in a 9x13 baking dish in two layers. Sprinkle half the zest on the first layer, lay down the second, and sprinkle the rest on top. 
3. In a bowl, melt the butter, let it cool for a few minutes. Next, whisk in the milk, eggs, brown sugar, salt, cinnamon and nutmeg. 
4. Pour the mixture over the bread, cover, and place in the fridge over night. 
5. The next morning, take the French toast out, uncover and let it sit out while the oven preheats to 350F. Bake for 30 minutes until the top is lightly golden and puffed up. Remove, cool for 5 minutes and serve with butter and maple syrup.  


For the Whiskey Maple Syrup:
Melt 4 TBSP of butter in a sauce pan over low heat. Next add in 2 C pure maple syrup, 1/4 TSP cayenne, a dash of cinnamon and nutmeg, 1/4 C+ 1 TBSP whiskey, and stir until the ingredients have mixed together evenly. Remove from heat, allow the syrup to cool, and transfer into a glass serving bottle. 
This could be you. 
Love,
Boulder Butter 

Thursday, February 6, 2014

Gingerbread Cake with Cranberry Streusel

       So it may seem I once again disappeared between posts for a while, but I can assure you this recipe is worth the wait. Last week, I tested a new baking book's banana muffins, not intending to blog them since it was my first time using that source. They were brilliant: little nuanced additions and techniques created the most decadently creamy and moist banana bread I've ever had. Alas, I had no photos, so I could not share them. (Not to fret, that recipe will come.) Then three days of dedicated banana muffin eating passed by and I reentered the kitchen with a new baking project. I prepared a post, took photos and was excited to share, only to find out in the end, my peanut butter ice cream was a disaster I could bare pretend worth sharing. So finally, at the start of a bitterly cold week in Colorado, I made the ideal winter snacking cake-and it is absolutely worth sharing.
       It is a deep ginger bread cake, with robust dark molasses, which needlessly to say, pairs well with the heavy ginger spices. Other notes of cinnamon, nutmeg, and clove dance around to add complimentary warmth. The molasses is met with equal parts honey that brings of a more floral sweetness to the cake, particularly around the edges where the heat directly caramelizes it. However, it is the most subtle difference which will enhance the cakes tons, but be the ingredient that people cannot figure out what is slightly different. 
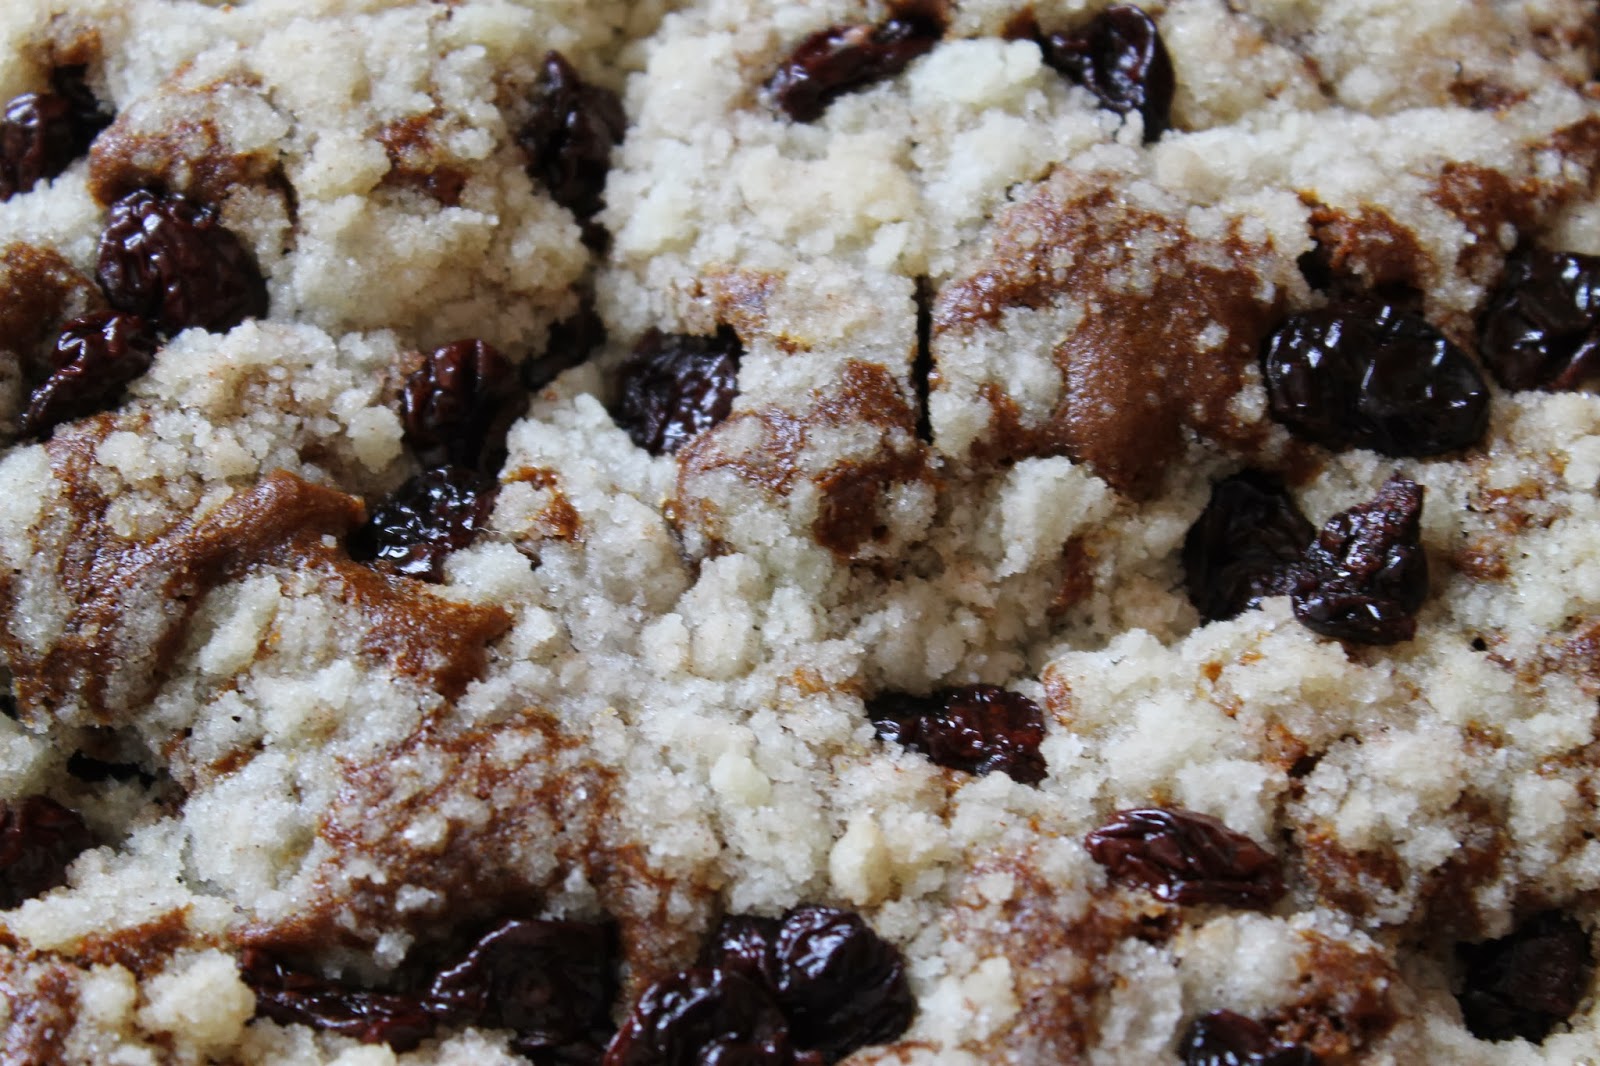
        Then comes my favorite part: the topping. The cake is covered with a crunchy, light streusel. It forms crunchy bites of sweetness sprinkled all over. Next to the natural bitterness of molasses and ginger, it could not be a more perfect compliment. I know if most people add dried fruit to gingerbread, the go with candied ginger, but I am telling you, cranberries will quickly change your mind. They are equally warm in profile to the cake base, enhancing its natural and desirable qualities. They then give a sticky, soft contrast to the crunchy streusel and tartness to the sweet. The bottom is warm and happy and the top is to die for. Digging your fork through them both and getting a thick bite is just what you should do to survive this horrendous cold. Serve it with tea and you are in business. 
Cake portion adapted from Joy of Cooking by Irma S. Rombauer and Marion Rombauer Becker

**This cake is very specific to high altitude adjustments. You can use the streusel topping anywhere, but if you are not at altitude, please read the changes at the bottom of the page. Then follow the normal instructions starting at #7. 

Ingredients
Cake: 
2 1/2 C all-purpose flour, sifted
3/4 TSP baking soda
1/2 TSP salt
1/4 TSP cinnamon
1/4 TSP nutmeg
1/8 TSP clove
1 TSP ginger
1/2 C (1 stick) butter, room temperature
1/2 C sugar
2 eggs
1/3 C+ 1 TBSP dark molasses
1/3 C + 1 TBSP honey
2/3 C boiling water

Topping: 
3 TBSP cold butter
3 TBSP flour
6 TBSP sugar
1 TSP cinnamon
1/3 C dried cranberries

Instructions: 
1. Grease and line a 9" round baking pan. Preheat the oven to 350F
2. In a medium bowl, whisk together the flour, soda, salt, cinnamon, nutmeg, clove and ginger. Set aside.
3. In a large bowl, using a hand mixer, cream together the butter and sugar until light and fluffy. 
4. Add the eggs, one at a time, then beat for another 30 seconds on high, until light and fluffy.
5. Add in the molasses and honey, then beat until fully incorporated. 
6. Switch to a spatula. In 3 additions of flour mixture and 2 additions of boiling water, add the two alternating (starting and ending with the flour) to the liquids. Mix in the ingredients until fully combined, mixing and scraping down the sides between each addition.
7. Pour the batter into the prepared baking dish, even out the top and set it aside.
8. In a small bowl, cut together the butter, flour, sugar, and cinnamon until they have broken into large pea sized clumps.
9. Sprinkle the streusel evenly over top, then sprinkle the cranberries on top as well. 
10. Bake for 40-50 minutes, removing when an inserted knife or toothpick comes out clean of the middle.
11. Let the cake cool for 10 minutes, then invert the cake to remove it from the pan and turn over once more to serve streusel side up. 
The cake is best warm and would be heavenly with a dollop of whipped cream (then again most things would be heavenly with a dollop of whipped cream.)

**For those not at altitude (changes are italicized):
1/2 C Butter
1/2 C Sugar
1 Egg
2 1/2 C AP flour (sifted)
1 1/2 TSP baking soda
1 TSP ginger
1/4 TSP each cinnamon and nutmeg
1/8 TSP clove
1/2 TSP salt
1/2 C dark molasses
1/2 C honey
1 C boiling water

1. Melt the butter and allow to cool.
2. Beat together the egg and sugar.
3. Stir in the butter to the eggs and sugar.
4. In a separate bowl sift all the dry ingredients together.
5.  In another bowl, combine the molasses, honey and water.
6. Add the dry mixture and wet mixtures alternating as described in step 6 above. 
   Continue with the recipe as normal from here.