Tuesday, October 15, 2013

Gingerbread and Pumpkin Ice Cream Sandwiches

         There have been some articles circulating recently about a restaurant in New York that focuses on mindful eating by having patrons arrive by a scheduled time and eat the their entire meal in silence (A Silent Dinner Experience). Instead of focusing on the other distractions we so often put around us during our meals, the mind has the opportunity to think about what it is actually eating. 
       I think we all get a little distracted nowadays. I understand and am in the same boat. I have a phone, a computer, and books I want to read. With how busy we all get it is easy to want to use food time to coincide with "catch-up on the latest time." However, the article I read brought up a very awesome point of today. A meal like this make you focus on your food and puts you in a state of communion between your body and what is nourishing it. Instead of focusing on restricting things, it brings light to what taste good, when it feels good to eat, and how the food is for you as an expierience. 
      I think a practice of mindful eating is great to develop. Rather than having your email open during breakfast, just sit there and let your mind focus on the flavors you are enjoying. Perhaps while you eat dinner with your friends or family, make a point to discuss what you taste and the preparation of dish itself. I definitely do not think we have to eat each meal in silence, but community can be formed not only eating the food together, but also talking about the food together.
        When you eat these cookie sandwiches, try focusing on the pleasure it brings you. For instance, you can focus on the sensations of the different coldness levels between the ice cream and the cookies. Or perhaps ponder the way the texture of the cookie changes while frozen, and how the bite feels against your teeth. Flavors are enhanced with temperature changes, so when foods are hot or cold, they seem more flavorful to us. These cookies have a lot of spice in them, so maybe try focusing on if you can pick out the cinnamon, ginger, nutmeg, and black pepper individually. Also, how do the spices contrast between the cookies and ice cream? Or do you not find they do much at all? Can you find the tang from the sour cream in the ice cream? Think about the elements individually and the experience as a whole. I would be curious when you finished, how you felt it differed from any normal time you eat dessert.  
         I find focusing on the food can bring us a greater level of pleasure. Figuring out why we like something, why it tastes or feels good to us is one way to find a more complete enjoyment of our food in general. Additionally I find it a more holistic way of connecting our bodies with our food. I really believe some things we eat are good for us just because they make us happy. Its one of the reasons I love food and dedicate so much time to it. I love bringing not only myself, but also others happiness through a bite. So maybe just giving that food the attention to allow it to bring us the happiness is the key.
*A note on the recipes: I was asked by a few readers to do a more health conscious post. So for a change of pace, these are non-fat and partially whole-wheat gingerbread cookies. They are out of this world good, and I will make them again as a go to. I trust David Lebovitz's recipes and as always, after using one I remembered why. They were perfectly chewy, flavorfully spiced, and pleasantly thick. In my opinion, they are by far the wow-factor of this dessert. The ice cream is yummy, but the because it is lower fat (made with 1% milk) it is not as smooth and creamy as normal ice cream. For a more health conscious option, I think it is good; otherwise I would not have posted it. However, if I made these again, I would personally just prefer the full-fat deliciousness of ice cream. If you would like to do the same, here is a traditional custard based pumpkin ice cream recipe I would recommend instead.  David Lebovitz's Pumpkin Ice Cream


Pumpkin Spice Cream:
Adapted from Cooking Light's Pumpkin Spice Cream, September 2002
Ingredients:
1 1/2 C low-fat (1%), divided
2 TBSP dark brown sugar
2 large egg yolks
1 (14 oz.) can full fat sweetened condensed milk
1 TSP vanilla extract
1/4 TSP ground nutmeg
1/4 TSP ground ginger
1/4 TSP ground cinnamon
Dash of salt
1 (15 oz.) can pumpkin puree, divided
8 oz. full fat sour cream

1. In a medium sauce pot, combine 1 cup of the milk and the brown sugar, until the sugar is dissolved and bubbles are just beginning to form around the sides of the pot (do not let the milk boil). Remove from heat.
2. Whisk the yolks together, and then slowly add the milk into the egg yolks, whisking constantly, make sure not to cook the eggs in the process. You can use a hand mixer on the lowest speed for this.

3. Pour the mixture back into the pot, place it over medium heat, and whisking constantly, let the mixture thicken until it coats the back of a metal spoon (about 4 minutes). Strain the custard through a sieve and discard any solids that may have formed.
4. In a separate mixing bowl, combine the sweetened condensed milk, vanilla extract, spices, and salt. Then stir in 1 cup of the pumpkin puree.
5. Slowly add in the custard, whisking constantly during the process.
6. Pour into a container and chill the ice cream base for at least 8 hours.
7. After the chill period, mix together the sour cream and remaining pumpkin puree, until thoroughly combined.
8. Add the sour cream mixture to the ice cream base, mixing the two together and then freeze the mixture according to your ice cream maker's instructions.

Whole Wheat, Nonfat Gingersnap Cookies:
Barely adapted from David Lebovitz's Nonfat Gingersnaps
Oven Temp: 350 F
Ingredients:
1 C packed dark brown sugar
1/4 C applesauce
1/3 C molasses
1 C all-purpose flour
1 1/4 C whole-wheat flour
3/4 TSP baking soda (at sea level, use 1 TSP)
2 1/2 TSP ground cinnamon
1 1/2 TSP ground dried ginger
1/4 TSP nutmeg
1/2 TSP ground black pepper
1/4 TSP salt
2 large egg whites, at room temp.

1. In stand mixer with a paddle attachment, beat together the brown sugar, applesauce, and molasses for 5 minutes on medium speed. Scrape down the sides once in the middle, and once at the end.
2. Meanwhile, sift together the flours, baking soda, spices, and salt.
3. Add in the egg whites to the brown sugar mixture and beat for one minute.
4. Turn the mixer down to the lowest speed and slowly add in the flour until it is fully incorporated, then continue to mix for one more minute.
5. Transfer the dough to an airtight container and refrigerate for 8-24 hours.
6. After the chill time, remove the dough and preheat the oven.
7. Scoop and roll the dough into 1 inch rounds. Then roll the dough balls around in sugar. Place them evenly apart with room to spread on a cookie sheet and gently press each ball down with your fingers.
8. Bake the cookies for 9-10 minutes until the centers are just beginning to set. You want to watch these carefully and pull them on time so they stay soft and chewy.
9. Let the cookies cool completely on a metal rack, then transfer them into a zip lock bag into the freezer to prepare them for ice cream sandwich assembly.
Final Steps:
When the cookies have frozen and the ice cream is set, take two cookies and scoop a small round of ice cream into the middle of one. Place the second cookie on top and gently press down.
Quickly wrap the cookie sandwich in plastic wrap and place it back in the freezer until you are ready to eat it.
Proceed again until all the cookies sandwiches are made and safely in your freezer. Enjoy! 

Monday, October 7, 2013

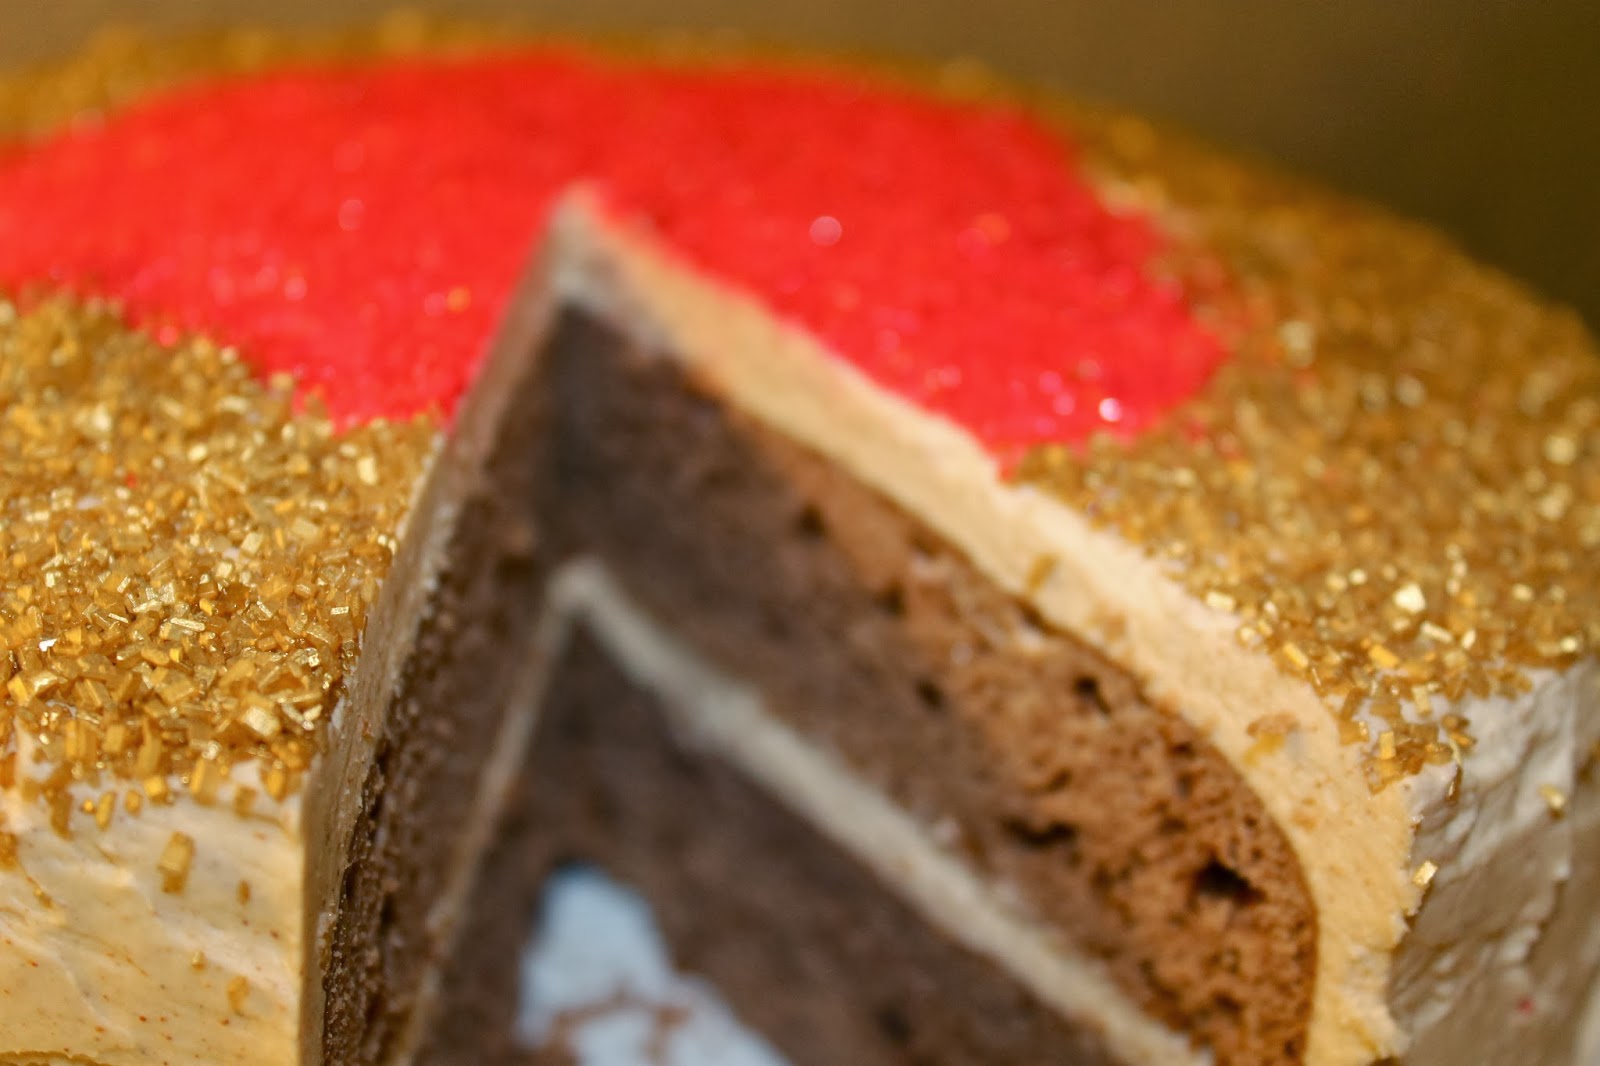
Chocolate Velvet Cake with Cinnamon Buttercream

        It has gotten cold...the air is brisk, there is frost on my car when I go out  in the mornings for work, and I have to wear layers on top of my layers. I have mixed feelings about this time of year. On the one hand, I do love the holidays, the beautiful fall colors, and sweaters. On the other hand, I really dislike the cold, the wind, and feeling like my bones have caught a chill. You guys can probably tell my grief with this time of year comes from really only one aspect.
        There is only one thing that can truly trump the dreaded freeze that overtakes us though. Food is the true preserver of happiness and memories of warmth during these cold times of the year. The harvest that arrives is spectacular. The flavors we can capitalize on are tantalizing. The prospect of a big, warm, melty casserole is oh so spectacular. My tummy gurgles with anticipation. Fall and winter flavors make all the bundling worth it, because when you sit down to a bowl of butternut squash soup or a thick veggie lasagna, you feel all warm inside.
        Of course, you need dessert to match such delicious meals at this time too. I know pumpkin everything is all the craze right now, and yes I will make pumpkin something when the time is deserving this fall, but look guys, pumpkin is not the whole season. Let me very straight with you: for me, pumpkin does not hold kingship over the cool whether coming in. I will go the season without a single Pumpkin Spice Latte, and be all the more happy I did.
        What I do want though, is cinnamon. It makes you feel cozy and a well-balanced combination of sugar and cinnamon is hard to be reckoned with folks. We had our first frost in Colorado this last Friday and you bet your tooting horses I was ready for cold weather baking. For me, that meant finding something with yummy cinnamon, that would fill not only my body, but mind with feelings of warmth.
        I am a fan of the delicate flavor, and gentle chocolate notes of Red Velvet cake, but I have no real interest in a brightly questionable colored slices of food. So today, we have a Chocolate Velvet Cake; very lightly flavored with cocoa, but just enough to still develop the rich, bittersweet notes that we crave in a chocolate cake. The frosting is the star though, and the comfort of the warmth I wanted. I will always be a fan of the traditional cream cheese that normally is with Red Velvet; however, sometimes you need to go outside the box. As it is light chocolate and creamy cinnamon were born to be together. The cocoa flavor paired with the strong, deep cinnamon, was warmth all the way from my mouth to my stomach. Beautiful for the holiday season, festive in color, and very flavor appropriate, this cake is a delectable way to warm yourself back up when the evening chill takes over!

Very barely adapted from "Baked: New Frontiers in Baking" by Matt Lewis and Renato Poliafito

Oven Temp: 350 F (325 F at sea level)
Equipment: Stand Mixer/Hand Mixer
                            Two 9" round cake pans 

Ingredients:
Cake:
1/4 C unsweetened cocoa powder 
1/4 C boiling water
6 TBSP unsalted butter, room temp, cut into small chunks
2 TBSP shortening, room temp
1 2/3 C sugar
3 large eggs, room temp
1 C sour cream (or buttermilk)
1 TSP vanilla extract
2 1/2 C cake flour (or a soft winter wheat all purpose-like White Lily)
1 TSP fine salt
1 TBSP cider vinegar
3/4 TSP baking soda (1 TSP at sea level)

Cinnamon Frosting:
1 1/2 C sugar
1/4 C all-purpose flour
1 1/2 C milk
1/4 C heavy cream
1 1/2 C (3 sticks) unsalted butter, room temp, in small pieces
1 TSP vanilla extract 
1 TBSP cinnamon

Decorative Sprinkles (optional)

Instructions
Spectrum is a brand of all-natural, organic, and non-hydrogenated shortening available at most grocery stories.
1. Preheat the oven and grease, then line cake pans with parchment paper.
2. Whisk together cocoa powder and boiling water in a bowl.

3. In a stand mixer, fitted with the paddle attachment, cream the butter and shortening until they are smooth. Scape down the sides, add sugar and continue to cream until the mixture is light and fluffy (about 3-5 minutes).
4. Add the eggs, one at a time, beating after each addition. 
5. Stir together vanilla, sour cream, and cooled cocoa mixture in a separate bowl.

6. Sift together flour and salt in another bowl. 
7. Add the flour mixture and cocoa mixture to the egg mixture, alternating the two in a series of three additions. Begin and end with the flour mixture, scrape down the sides between additions, and beat until fully incorporated.
8. In a small bowl, whisk together vinegar and baking soda. It will fizz up.
9. Remove the bowl with batter from the stand mixer, and with a spatula, mix in the baking soda mixture until just combined.
10. Divide the batter among the prepared pans, smooth the tops with the back of a greased spatula, and bake for 20-25 minutes until the sides just begin to pull away from the sides and an inserted toothpick comes out clean (this will take 25-30, at sea level in 325 F oven).
11. Let cakes cool for 5-10 minutes, then run a knife along the edges, invert the cakes, and let them finish cooling on a rack.

The Frosting:

1. Combine sugar and flour in a heavy bottom sauce pot over medium heat and whisk together. Then, add the heavy cream and milk. Whisk occasionally to make sure no clumps form in the sugar/flour mixture.  Let the mixture come to a gentle boil until it has thickened (almost to a sweetened condensed milk consistency).

     -You want the mixture to thickly coat the back of a wooden spoon, so when you drag your finger  across, the liquid does not automatically fill the line back in. 
2. Remove the mixture from the heat and let it cool completely.
3. Cream the butter in the bowl of a mixer fitted with a paddle attachment on medium speed until smooth.
4. Reduce to a low speed, and slowly drizzle in the thickened milk mixture until well combined. Then increase the speed and beat until the frosting is light and fluffy.
5. Add in the vanilla and cinnamon and beat until they are well incorporated. 

Assembly:
Place down the first cake round, top it with frosting, and then spread evenly over the top with an offset spatula. Add the second round and repeat. Dolloping on frosting to the sides, guide the frosting around the edges to cover completely. The stiff nature of the buttercream will allow this to be easily manipulated with your spatula. 
Once the cake is fully covered, make a thick line of sprinkles around the edges, the spread the sprinkles with your fingers to create a ring around the edge of the cake. Repeat in a similar action in the middle of the cake with a different color sprinkle until the center is covered.
Enjoy and stay warm!