Showing posts with label Cake Decorating. Show all posts

Wednesday, March 19, 2014

Spring Carrot Cake

      This Saturday I went to a yoga class at a local brewery. (Yes, take a moment to appreciate that I get to go to drop-in yoga classes at a brewery. Lord knows, I am grateful for them!) The instructor talked about following your intuition and the path of your heart, versus making a decision out of fear in the desire of "taking the safer path." Right now, I feel somewhat at a crossroads with life and not knowing exactly what my heart says versus what is the decision made from living in fear. Sometimes we get so muddled in our heads; it is hard to balance and remember what we even really want. 
       It is times like this I turn to my mixing bowls. I start in the motions that I know. The motions that bring me peace. I mix my wet ingredients and my dry ingredients. I bring them together, get them in the oven and I wait until they begin to produce some new glorious smell in the kitchen. I think such a simple thing sometimes awakens my heart enough that I can hear it again and start to sort it all out. 
      The simplicity of a cake is sometimes all you need to bring you to a more grounded place. Cake is nostalgic and I think carrot cake in particular has strong a resonance of comfort. This carrot cake does not venture to far off your traditional versions, but there are two things I particularly love about it.
     First, it is not a spice cake. It has cinnamon and it lets that speak, but it is not overwhelmed with it; nor is it packed with an elaborate spice blend found in so many carrot cakes. This is simply an extremely moist carrot cake with hints or warmth. I also love that is it is packed with tang and citrus throughout. There is an extremely subtle orange simple syrup, which would be impossible for the eater to pick out, but adds that extra oomph. The cranberries, tart and zingy, are a bright and chewy addition scattered throughout.
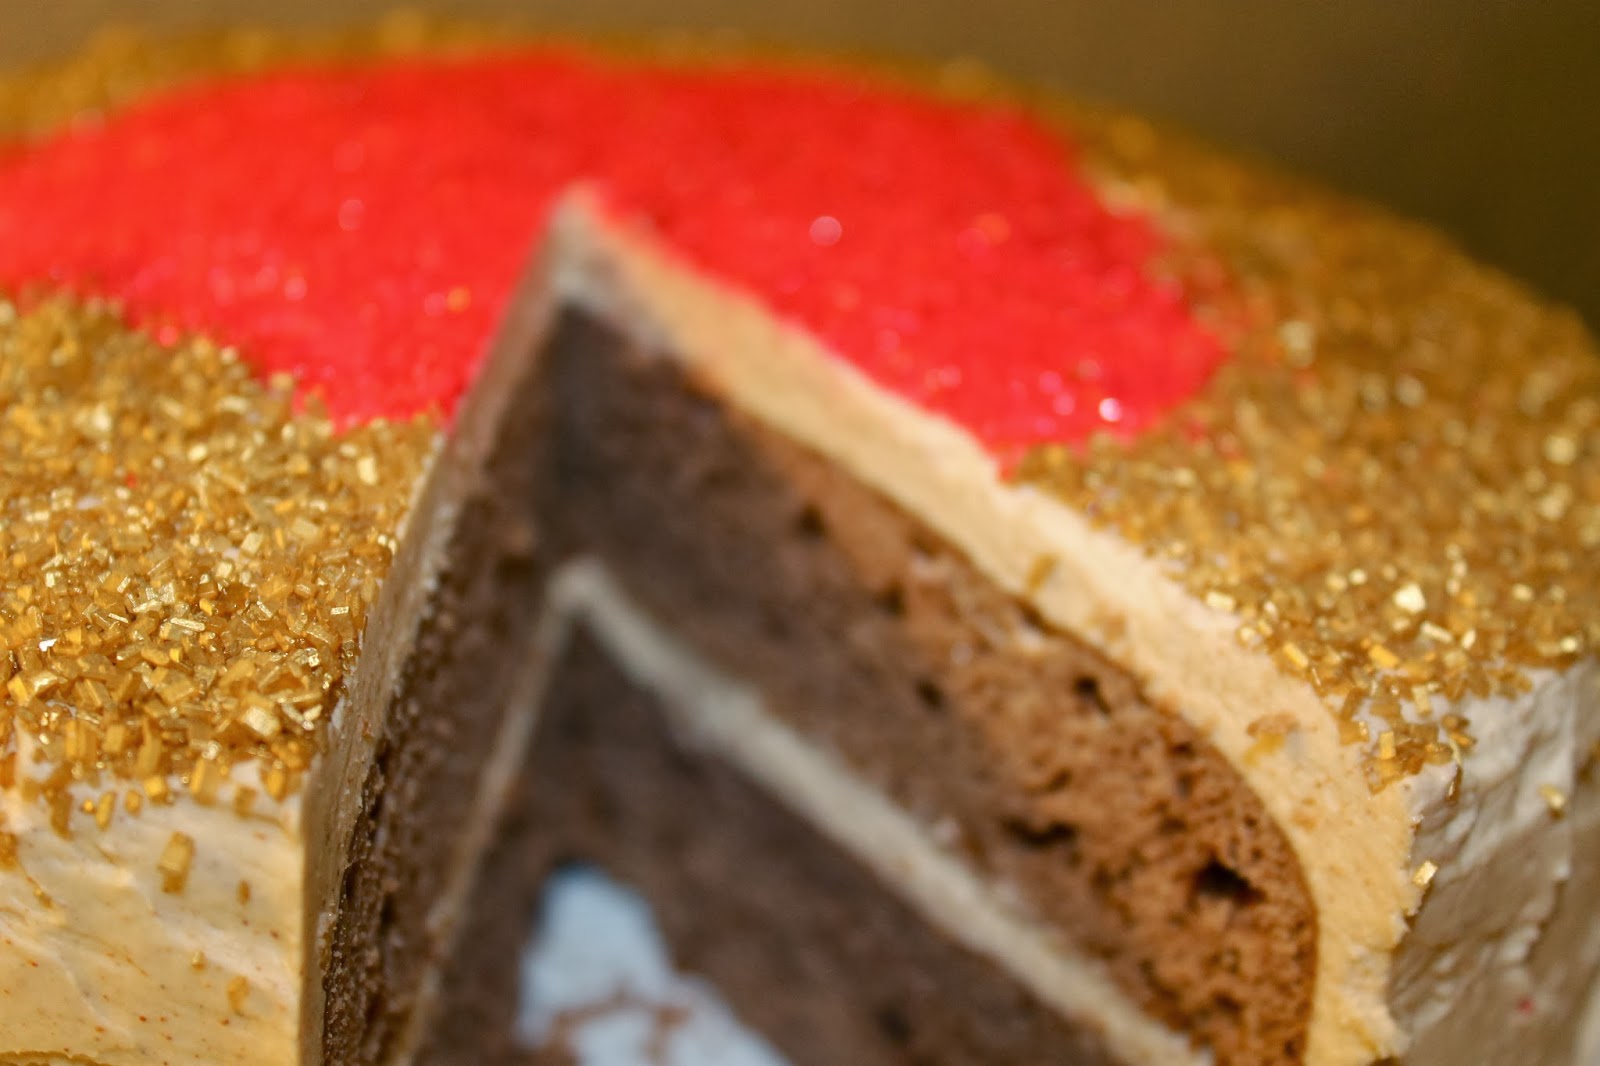
Sometimes, the best thing about cake is eating it with the people you love. You can spot a glimpse of my co-baker in the back :)
     Finally, the lemon cream cheese frosting is made with lemon zest and juice. It delivers a sweet tang to the cake and creates an absolutely heavenly balance. Then the walnuts on the side add a creamy nuttiness. Their crunch and natural richness are a perfect compliment for the bright frosting. 
     Everyone has had carrot cake, and there are so many recipes for it. I can tell you though, particularly with spring abloom, this one is worth making. 


Adapted from the absolutely awesome, Joy the Baker's Cookbook by Joy Wilson

Ingredients:
Cake
3 1/3 C all-purpose flour
1 1/2 TSP baking powder (2 TSP at sea-level)
3/4 TSP baking soda (1 TSP at sea-level)
1 TSP salt
2 TSP ground cinnamon
3 large eggs+1 large egg yolk
1 C granulated sugar
1 C + 2 TBSP packed brown sugar
1 3/4 C canola oil
1 C chunky (preferably homemade) applesauce
1 TSP vanilla extract
1 TSP hazelnut extract (or 1 more TSP vanilla extract)
3 C grated carrots
1/3 C moist, dried cranberries 

Instructions:
1. Place racks in the center of the oven and preheat it to 350 F. Grease, line with parchment, and flour 2, 9" round cake pans.
2. In a large bowl, sift or whisk together the flour, baking soda and powder, salt, and cinnamon. 
3. In a medium bowl, whisk together the sugars and eggs until fully incorporated. Next, carefully add in the oil and patiently mix it in until it has fully combined with the sugar and eggs. It will seem like a lot of oil, but don't worry, just keep stirring and it will all work out :) 
4. Add the applesauce and extracts to the wet ingredients and mix until combined.
5. Add the wet ingredients into the dry in one go and mix to incorporate but try to do it in as few strokes as possible. Stir around the edges and bottom and fold it for the most effective motion. 
6. When it is almost fully mixed together, add the carrots and cranberries and finish folding together. 
7. Divide the batter evenly between the pans and bake for 30-35 minutes until an inserted skewer comes out clean from the center.
8. Let the cakes cool for 15-20 minutes on a rack before inverting.


Frosting
8 oz. cream cheese, softened
1/2 C (1 stick), unsalted butter, softened
Pinch of salt
2 C powdered sugar
2 TSP vanilla extract
2 TSP lemon zest
1 TBSP lemon juice
1 C chopped walnuts for garnish (optional)

Using a hand mixer or a stand mixer with a paddle attachment:
Beat the cream cheese for one minute, until light and pliable. Scrape down the sides of the bowl.
Add the butter and beat for another one to two minutes until there are no clumps left and the two are fully incorporated.
Add the lemon juice, zest, powdered sugar, salt, and vanilla and beat on a low speed until everything is almost fully incorporated.
Scrape down the sides, and beat at medium speed until the mixture is smooth and all the powdered sugar has disappeared. 

Orange Flower Water Simple Syrup (optional): this will keep you cake moist for a longer time
Place 1 C water, 1 C sugar and 1.5 TSP in a medium sauce pan on medium heat and stir occasionally until the sugar has fully dissolved. Remove from heat and allow it to cool. (You could also use 1.5 TSP orange juice. It will be slightly different but if you wanted the oranginess. Also you can just make plain simple syrup and leave out the flavoring).
-You will have extra, you can half the recipe or just store in your fridge for any cakey goods you make soon. It lasts a good while. 

Assembly: 
Once the cake has completely cooled, place your first round down. Brush or drizzle on the simple syrup over the entire puck. Top with frosting and spread it evenly to the edges. 
Repeat with the second layer, this time topping it with all of the frosting, spreading it evenly out to the edges and then carefully spread down and around the sides with an spatula. 
Garnish the sides or top with nuts depending how you like it and how patient you want to be with trying to get nuts to evenly cover the sides.
Serve immediately. This cake will last about 3-5 days in your fridge.

Love, 
Boulder Butter

Sunday, January 12, 2014

German Chocolate Cake


     I did not post much recently, and I wanted to give some explanation for my disappearance. In the food blogging world, the holidays are a frenzy of recipe testing and posting to pair with the merriment and holly hanging around the house. I was definitely recipe testing through the month (top contenders go to an old-fashioned apple cake with bourbon brown-sugar icing and a chocolate zucchini clove cake with whipped honey hazelnut frosting). However, the beginning of November through New Years Day is my absolute favorite time of the year and I was already working and thinking about baking in that fashion all the time. I needed some time to bake for myself, for my friends, and for my family. I needed to enjoy the time baking for what it sparks in me and what I can give to those around me with a brief intermission from writing and photographing it. 
     Luckily, I felt very rejuvenated in this process. I hope you guys all had a chance to bake for your own peace and to share with those you love over the holidays as well. Coming back, I was thinking about what I wanted to post next and in the fashion of baking for my soul, I settled on a German Chocolate Cake. I have wanted to make one for a long time and really what could be better for your soul than that?? 
     Then I made the cake...the filling did not thicken up as much as it was supposed too, so instead of being a thicker frosting-like consistency, it was more coconut and pecans as the filling with a lighter liquidy mixture. I was so bummed and I felt I could never post what in my mind was seemingly a "disaster cake." However, then I tried it and good god, I went back and forth deciding what to do. It is true, it was not the perfect traditional German Chocolate Cake. However, such a delicious resulting mishap could not be hidden from people. The cake had to be shared.
      The cake is moist chocolate, whose depth comes from cocoa powder, semi-sweet chocolate and sour cream. The edges caramelizes ever so slightly on the to form the perfect sugary bite in the cake with just the right balance. Then the two layers are cut in half to form four thin layers of cake. This is absolutely perfect for maximizing coconut-pecan goo enjoyment. Since the frosting did not thicken up enough, it formed a slightly thick, rich, moist, milky, sweet simple syrup that soaked through each layer into pure bliss. It left the coconut and pecans behind to form a sugary coated delicious filling between each layer. It was decadent and rich. You know what, folks? I don't care if it wasn't like your traditional German Chocolate Cake. It was to die for and I at more of that cake than most I have ever made. So now, I am sharing this unique treat, embracing my imperfection, and enjoying the heck out of another giant slice of this lovely cake. 
(If you want the thicker frosting, we will go over that in instructions, but really I think you should give this a try!)
Very very barely adapted from Cook's Illustrated "Baking Book"
Ingredients
Cake 
4 ounces semi-sweet chocolate (broken up)
1/4 C Dutch-processed cocoa powder
1/2 C boiling water
2 C all-purpose flour
3/4 TSP baking soda (a scant 3/4 TSP at altitude)
12 TBSP unsalted butter
1 C granulated sugar
2/3 C packed light brown sugar
3/4 TSP salt
4 large eggs, room temp
1 TSP vanilla extract
3/4 C sour cream

Filling/Frosting
4 large egg yolks
1 (12 ounce) can evaporated milk
1 C granulated sugar
1/4 C packed light brown sugar
6 TBSP cold butter, cut into pieces
2 pinches of salt
2 TSP vanilla extract
2 1/2 C sweetened shredded coconut 
1 3/4 C toasted, chopped pecans

Instructions:
Cake
1. Place oven rack in lower two thirds of oven and preheat it to 350 F. Grease two 9 in cake pans and line them with parchment paper.
2. Combine chocolate and cocoa powder in a small bowl, then pour the boiling water over it and stir until it is all melted together. Allow the mixture to cool.
3. Sift together the flour, baking soda, and salt in a medium bowl.
4. Using a stand mixer (or hand mixer and very large bowl) beat the butter and both sugars together on high until light and fluffy (about 3 minutes). 
5. Add the eggs, one at a time and beat until combined.
6. Add in the vanilla extract and beat until light and fluffy on medium-high speed (for about 45 seconds.) 
7. Add chocolate, beat on low to incorporate, then increase to medium speed for an additional 30 seconds.
8. Reduce the speed to low and add the flour and sour cream in alternating additions (3 additions for the flour and the sour cream in 2; start and end with the flour mixture.) Scrape the sides down as necessary and give the mixture a final stir by hand to make sure all is fully incorporated.
9. Divide the batter evenly into the pans, smooth the tops with a rubber spatula, and bake for 30 minutes until an inserted toothpick comes out clean.
10. Remove the cakes and let them cool for 10 minutes before inverting. Then let the cakes cool for an additional 2 hours before assembly. 

Filling/Frosting
1. Whisk the egg yolks in a medium-sized saucepan, then gradually pour in the evaporated milk. 
2. Add both types of sugars, butter, and salt and continue to whisk constantly over medium-high heat, until the mixture is frothy and thickened. The mixture should coat the back of a spoon and not fill in the lines if you were to draw your finger across it horizontally (Nappe consistency).
3. Remove from the heat, transfer the liquid to a bowl and stir in the coconut.
4. Cool until warm, cover directly with plastic and place in the fridge until it has completely cooled.
5. When you are ready to assemble, stir in the pecan pieces and begin. 

-There are not photos for most this this because I had to be whisking constantly to prevent the eggs from curdling.

Assembly
 1. Using a sharp, serrated knife, cut each 9 in cake in half so you have 4 thin disks. Begin by tracing an even line around the perimeter of the cake with your knife then following that line, cut in and around the cake.
2. Lay down one piece, then scoop 1 cup of filling onto the cake and spread evenly, making sure to bring it all the way to the edges. Repeat with each layer until all four have been place down. Pour all of the remaining filling mixture over top and spread in the same fashion as before.

Monday, October 7, 2013

Chocolate Velvet Cake with Cinnamon Buttercream

        It has gotten cold...the air is brisk, there is frost on my car when I go out  in the mornings for work, and I have to wear layers on top of my layers. I have mixed feelings about this time of year. On the one hand, I do love the holidays, the beautiful fall colors, and sweaters. On the other hand, I really dislike the cold, the wind, and feeling like my bones have caught a chill. You guys can probably tell my grief with this time of year comes from really only one aspect.
        There is only one thing that can truly trump the dreaded freeze that overtakes us though. Food is the true preserver of happiness and memories of warmth during these cold times of the year. The harvest that arrives is spectacular. The flavors we can capitalize on are tantalizing. The prospect of a big, warm, melty casserole is oh so spectacular. My tummy gurgles with anticipation. Fall and winter flavors make all the bundling worth it, because when you sit down to a bowl of butternut squash soup or a thick veggie lasagna, you feel all warm inside.
        Of course, you need dessert to match such delicious meals at this time too. I know pumpkin everything is all the craze right now, and yes I will make pumpkin something when the time is deserving this fall, but look guys, pumpkin is not the whole season. Let me very straight with you: for me, pumpkin does not hold kingship over the cool whether coming in. I will go the season without a single Pumpkin Spice Latte, and be all the more happy I did.
        What I do want though, is cinnamon. It makes you feel cozy and a well-balanced combination of sugar and cinnamon is hard to be reckoned with folks. We had our first frost in Colorado this last Friday and you bet your tooting horses I was ready for cold weather baking. For me, that meant finding something with yummy cinnamon, that would fill not only my body, but mind with feelings of warmth.
        I am a fan of the delicate flavor, and gentle chocolate notes of Red Velvet cake, but I have no real interest in a brightly questionable colored slices of food. So today, we have a Chocolate Velvet Cake; very lightly flavored with cocoa, but just enough to still develop the rich, bittersweet notes that we crave in a chocolate cake. The frosting is the star though, and the comfort of the warmth I wanted. I will always be a fan of the traditional cream cheese that normally is with Red Velvet; however, sometimes you need to go outside the box. As it is light chocolate and creamy cinnamon were born to be together. The cocoa flavor paired with the strong, deep cinnamon, was warmth all the way from my mouth to my stomach. Beautiful for the holiday season, festive in color, and very flavor appropriate, this cake is a delectable way to warm yourself back up when the evening chill takes over!

Very barely adapted from "Baked: New Frontiers in Baking" by Matt Lewis and Renato Poliafito

Oven Temp: 350 F (325 F at sea level)
Equipment: Stand Mixer/Hand Mixer
                            Two 9" round cake pans 

Ingredients:
Cake:
1/4 C unsweetened cocoa powder 
1/4 C boiling water
6 TBSP unsalted butter, room temp, cut into small chunks
2 TBSP shortening, room temp
1 2/3 C sugar
3 large eggs, room temp
1 C sour cream (or buttermilk)
1 TSP vanilla extract
2 1/2 C cake flour (or a soft winter wheat all purpose-like White Lily)
1 TSP fine salt
1 TBSP cider vinegar
3/4 TSP baking soda (1 TSP at sea level)

Cinnamon Frosting:
1 1/2 C sugar
1/4 C all-purpose flour
1 1/2 C milk
1/4 C heavy cream
1 1/2 C (3 sticks) unsalted butter, room temp, in small pieces
1 TSP vanilla extract 
1 TBSP cinnamon

Decorative Sprinkles (optional)

Instructions
Spectrum is a brand of all-natural, organic, and non-hydrogenated shortening available at most grocery stories.
1. Preheat the oven and grease, then line cake pans with parchment paper.
2. Whisk together cocoa powder and boiling water in a bowl.

3. In a stand mixer, fitted with the paddle attachment, cream the butter and shortening until they are smooth. Scape down the sides, add sugar and continue to cream until the mixture is light and fluffy (about 3-5 minutes).
4. Add the eggs, one at a time, beating after each addition. 
5. Stir together vanilla, sour cream, and cooled cocoa mixture in a separate bowl.

6. Sift together flour and salt in another bowl. 
7. Add the flour mixture and cocoa mixture to the egg mixture, alternating the two in a series of three additions. Begin and end with the flour mixture, scrape down the sides between additions, and beat until fully incorporated.
8. In a small bowl, whisk together vinegar and baking soda. It will fizz up.
9. Remove the bowl with batter from the stand mixer, and with a spatula, mix in the baking soda mixture until just combined.
10. Divide the batter among the prepared pans, smooth the tops with the back of a greased spatula, and bake for 20-25 minutes until the sides just begin to pull away from the sides and an inserted toothpick comes out clean (this will take 25-30, at sea level in 325 F oven).
11. Let cakes cool for 5-10 minutes, then run a knife along the edges, invert the cakes, and let them finish cooling on a rack.

The Frosting:

1. Combine sugar and flour in a heavy bottom sauce pot over medium heat and whisk together. Then, add the heavy cream and milk. Whisk occasionally to make sure no clumps form in the sugar/flour mixture.  Let the mixture come to a gentle boil until it has thickened (almost to a sweetened condensed milk consistency).

     -You want the mixture to thickly coat the back of a wooden spoon, so when you drag your finger  across, the liquid does not automatically fill the line back in. 
2. Remove the mixture from the heat and let it cool completely.
3. Cream the butter in the bowl of a mixer fitted with a paddle attachment on medium speed until smooth.
4. Reduce to a low speed, and slowly drizzle in the thickened milk mixture until well combined. Then increase the speed and beat until the frosting is light and fluffy.
5. Add in the vanilla and cinnamon and beat until they are well incorporated. 

Assembly:
Place down the first cake round, top it with frosting, and then spread evenly over the top with an offset spatula. Add the second round and repeat. Dolloping on frosting to the sides, guide the frosting around the edges to cover completely. The stiff nature of the buttercream will allow this to be easily manipulated with your spatula. 
Once the cake is fully covered, make a thick line of sprinkles around the edges, the spread the sprinkles with your fingers to create a ring around the edge of the cake. Repeat in a similar action in the middle of the cake with a different color sprinkle until the center is covered.
Enjoy and stay warm!