 |
| The final slice. |
 |
| And every slice you serve looks just as tempting. |

I chose a deliciously moist and light Devil's Food Cake with a deep, dark chocolate flavor, that is studded with tiny semi-sweet chocolate pieces, which add bursts of creamier chocolate sweetness throughout the cake. The white frosting is hardly what we connect with frosting normally. It is a light and airy "white mountain" meringue-like topping. Its delicate nature reinforces the depth of chocolate, enunciates the overall moistness, and adds a complimentary layer of a palate cleanse between the layers of cake and crumb! The middle is dusted with a thin layer of sweetened coconut, which brings a surprising brightness when you first dig in. Finally, the cake is made beautiful and more vibrantly chocolatey by the top and sides being packed with coating of some of the devil's food cake that has been crumbled into small pieces. These are melt-in-your-mouth moist and play perfectly into texture of the meringue icing. Great for dinner parties, a small gathering of friend, or just a way to show your appreciation to a person, this cake is an example of delicate sophistication of flavor and airiness, with undeniable good looks!
Adapted from Dorie Greenspan's "Devil's Food White-Out Cake" in Baking: From My Home to Yours.
Oven Temp:375 F first 14 min*
350F final 6 min.
Adapted from Dorie Greenspan's "Devil's Food White-Out Cake" in Baking: From My Home to Yours.
 |
| Cake |
350F final 6 min.
Equipment:
-Two 9'' round cake pans
-Candy Thermometer
-Stand Mixer (it would be difficult to do this as one person without one. If you have a kitchen companion you could probably pull it off with just a hand mixer.)
-Two 9'' round cake pans
-Candy Thermometer
-Stand Mixer (it would be difficult to do this as one person without one. If you have a kitchen companion you could probably pull it off with just a hand mixer.)
Cake Ingredients:
1 1/3 C All Purpose Flour
1/2 C Cocoa Powder**
1/2 TSP Baking Soda*
1/4 TSP Baking Powder
1/4 TSP Salt
10 TBSP Unsalted Butter (1 1/4 Sticks)
1/2 C (packed) Brown Sugar
1/2 Sugar
3 Eggs (large, room temperature)
2 oz. Semi-sweet Chocolate, melted and cooled
1 TBSP Vanilla Extract
1/2 C Buttermilk OR Whole Milk
1/2 C Boiling Water + 1TBSP Instant Expresso Powder OR 1/2 C Hot Coffee
2 oz. Semi-sweet or Milk Chocolate rough chopped into small pieces or mini chips
* These adjustments are for high altitude baking: At lower elevation/sea level, the oven can be at 350F the entire time and may take 25 minutes instead of 20.
*Also, the baking soda will be 3/4 TSP and the baking powder will be 1/2 TSP at sea level elevation.
**I used 1/4 C natural, 1/4 C Super Alkalized Cocoa Powder; you can just do 1/2 C Dutch-Processed if that's what you have on hand
 |
| Boiling Mixture for Frosting |
1/2 C or 4 large Egg Whites
1 TSP Cream of Tartar
1 C Water
1 C Sugar
1 TBSP Vanilla Extract
3/4 C Sweetened Coconut (optional)
1 TBSP Vanilla Extract
3/4 C Sweetened Coconut (optional)
Preparations:
1. Place a rack in the center and preheat your oven.

Cake Instructions:
 1. Sift together the flour, cocoa powder, baking soda, baking powder, and salt.
 2. Beat the butter for about 3 minutes on medium speed, until it is very soft and creamy.

 3. Add both sugars and beat for another 3 minutes (medium speed).

 4. Add the eggs, one at a time, allowing the mixture to beat for a minute between each addition (medium speed).
 5. Add the vanilla extract and mix until incorporated (medium speed). Don't worry if the mixture looks broken or curdled at this point.


 7. Add in the melted chocolate and mix on a low speed until evenly incorporated.

 6. Alternate adding the flour mixture and the buttermilk. Starting and ending with the flour. You will add flour 3 in additions and the buttermilk in 2 (all of this is on a low speed).
 Mix until incorporated each time, taking time to scrape down sides as needed between additions. The batter will be very thick at the end of this process.

 7. Add the boiling expresso water or coffee in a slow drizzle. This will thin the batter significantly. (low speed)
 8. Remove the bowl from the mixer, and fold in the chocolate pieces with a rubber spatula.
 9. Divide the batter between the two prepared cake pans.
If you have a scale, that is a great way to ensure even baking and size. Mine both came out to 501 g.
 10. Bake for 20-25 minutes. Remove when the tops are springy to the touch and an inserted toothpick comes out clean.
 11. After about 5 minutes of sitting on a cooling rack, run a knife along the edges and flip the cake against a large, flat cutting board. Remove the parchment paper and flip them one more time so they are both dome side up. Do this by placing another large flat cutting board on the bottom side and quickly inverting.


If you have a scale, that is a great way to ensure even baking and size. Mine both came out to 501 g.


Frosting Instructions:


1. Place the egg whites in a large, clean, and dry mixing bowl.
2. Get a candy thermometer out.
 3. Mix together water, sugar, and cream of tartar in a small, clean sauce pot. Dirty pots could lead to the sugar crystalizing.
 4. Bring the mixture to a boil over medium-high heat and cover with a lid for 3-5 minutes (closer to 3 for sea level and 5 for high altitude).
 5. Uncover and boil until sugar mixture reaches 242 F.
6. Start to beat the egg whites on medium speed until they form firm, shiny peaks. Watch this carefully as the egg whites will break very quickly once they reach the firm state.
7. Meanwhile, reduce the stove top temperature slightly or take the pot off direct heat to bring the sugar mixture back down to 235F.
---If the egg whites reach stiff peaks before the sugar is done, reduce the speed to low or turn the whisk off until the sugar is ready.
8. Using a container which you can easily control pouring from (like a liquid measuring cup), SLOWLY stream the sugar mixture into the egg whites, while whisking on a medium speed.
9. Aim for between the beater and edge of bowl. Splatters are inevitable, do not worry or try to scrape them down. Just keep beating/pouring.

 10. Once all of the sugar is added, let the mixture continue to whisk on medium for about 5 minutes, until it has completely cooled to room temperature.
----You can test this by placing your hand on the bottom of the mixing bowl and seeing if you can still feel any heat. Once it has completely cooled, turn off the whisk and remove the bowl.
11. It is best to use this immediately, but if you must, you can let it sit in the fridge for a little before assembly.
*I am sorry for less pictures during this section. It was an all hands on deck kind of project during the middle moments. If I was unclear or you have any questions please ask and I will do my best to answer!
Assembling the Cake:
 1. Using a serrated knife, carefully remove the puffed domes of the cake to make flat surfaces.
 2. Put the two left over domes in a separate bowl and crumble until you have a fine crumb mixture.
 3. Place the first cake disk cut side up, on a serving platter with cut parchment paper around the edges, so you can pull them out for an easy clean up after assembly.


 4. Spoon a large amount of frosting and spread with a cake spatula or the back of a spoon until it evenly covers the layer. Sprinkle with a light covering of coconut.
 5. Place the second cake round on top, cut side down.

 6. Frost the top layer and sides using same technique.
 7. Generously sprinkle the crumble over the top and sides; gently pressing it into the frosting as you go along.
 8. Carefully remove the parchment paper from the bottom.
9. Chill for at least one hour before serving. The cake can then be removed to return to room temperature for about 30 minutes before service or served cold.
 Bring this beautiful cake to the table and cut into it together so all can admire its appearance!
 Best of cake baking and eating times to all :)
2. Get a candy thermometer out.


6. Start to beat the egg whites on medium speed until they form firm, shiny peaks. Watch this carefully as the egg whites will break very quickly once they reach the firm state.
7. Meanwhile, reduce the stove top temperature slightly or take the pot off direct heat to bring the sugar mixture back down to 235F.
---If the egg whites reach stiff peaks before the sugar is done, reduce the speed to low or turn the whisk off until the sugar is ready.
8. Using a container which you can easily control pouring from (like a liquid measuring cup), SLOWLY stream the sugar mixture into the egg whites, while whisking on a medium speed.
 |
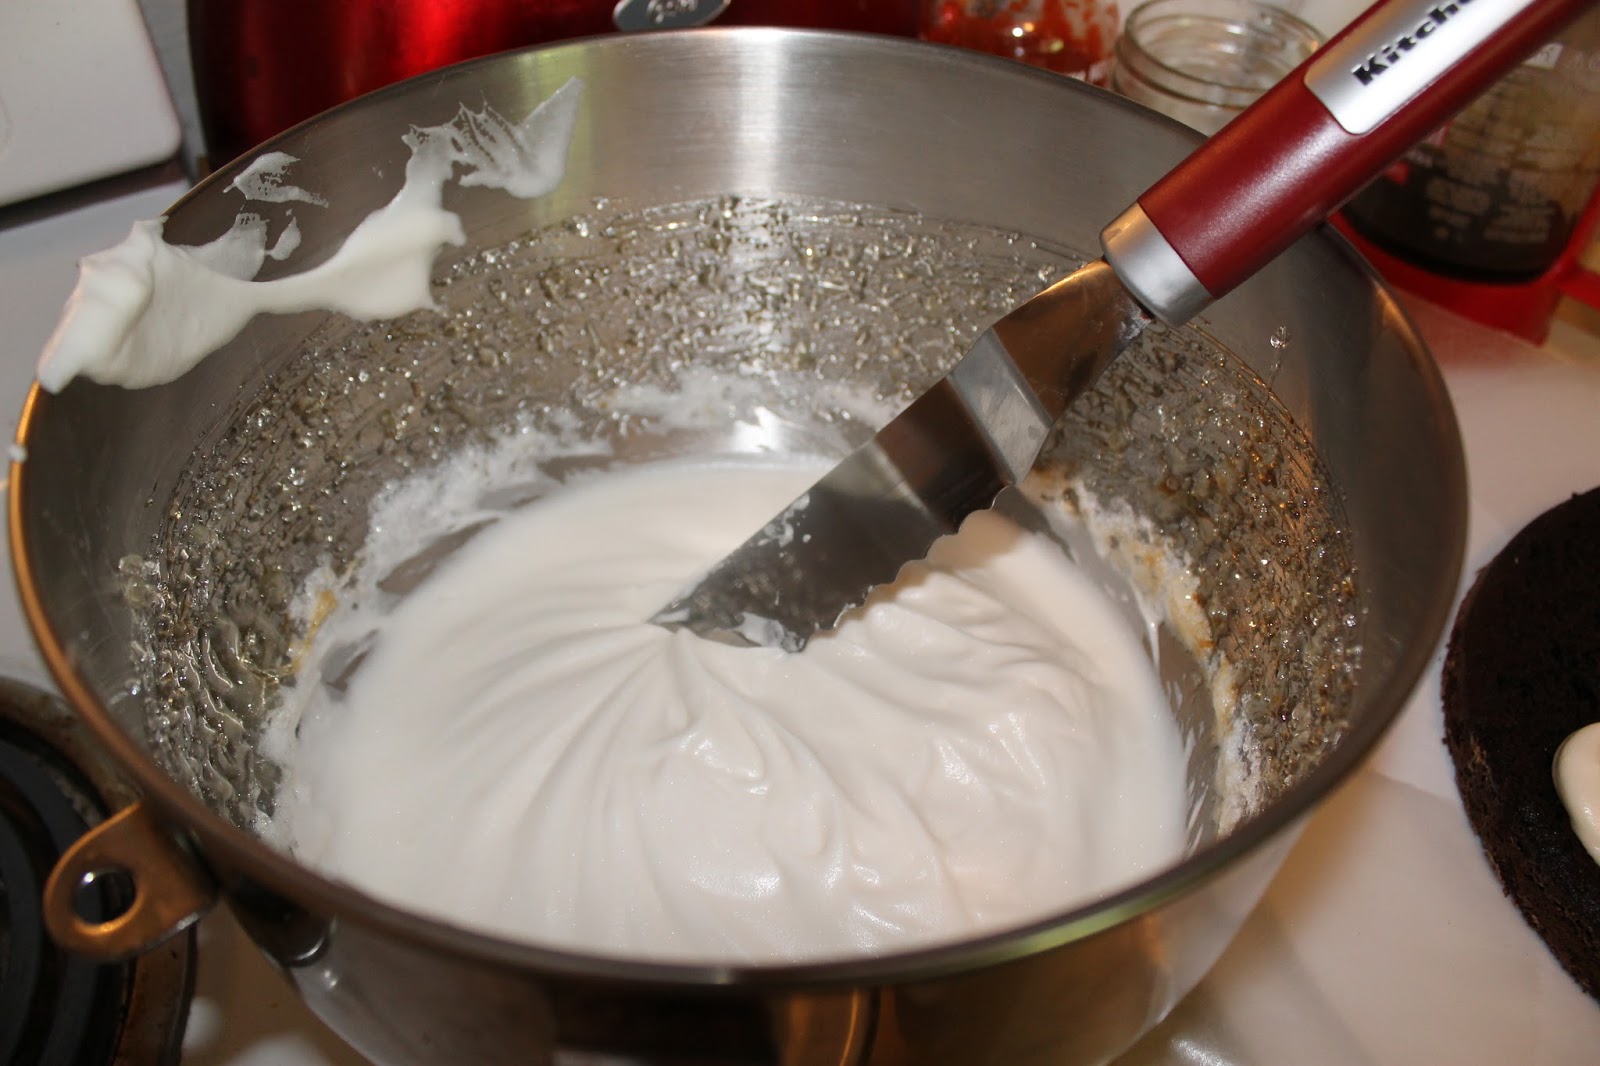
| You can see the sugar splattered up on the edges here. That is fine. |

----You can test this by placing your hand on the bottom of the mixing bowl and seeing if you can still feel any heat. Once it has completely cooled, turn off the whisk and remove the bowl.
11. It is best to use this immediately, but if you must, you can let it sit in the fridge for a little before assembly.
*I am sorry for less pictures during this section. It was an all hands on deck kind of project during the middle moments. If I was unclear or you have any questions please ask and I will do my best to answer!
Assembling the Cake:


9. Chill for at least one hour before serving. The cake can then be removed to return to room temperature for about 30 minutes before service or served cold.


